
If you’ve purchased an MSI motherboard and are facing technical issues, claiming a warranty can seem like a complicated process. In this guide, I’ll share my real experience and a step-by-step process for filing an MSI warranty claim.
MSI Motherboard Issue & Warranty Eligibility
A few months ago, I purchased an MSI B450-A Pro Max II motherboard. It worked fine for about 4-5 months, but gradually, I started experiencing issues. The main problems I faced were:
✅ PC not turning on consistently
✅ Intermittent functionality (sometimes working, sometimes not)
✅ Troubleshooting didn’t help long-term
Since the motherboard was under MSI’s 2-year warranty, I decided to claim the MSI warranty. Here’s how the process went.
Step 1: Initial Troubleshooting
Before filing a claim, I tried the following MSI motherboard troubleshooting steps:
- Checked RAM & cleaned it, assuming a carbon issue.
- Reinstalled components (RAM, GPU, power cables, etc.).
- Serviced the PC through the local seller, but the issue returned.
If your issue is similar, MSI support may ask you to troubleshoot first before approving a warranty claim.
Step 2: Contacting MSI Support
To start my MSI motherboard warranty claim, I called the MSI Service Center and explained the issue. The support agent advised me to visit the nearest MSI service center or send the motherboard directly to MSI’s main office in Delhi. Since I didn’t trust the local service center, I opted to send it to the main MSI office for repair or replace.
Step 3: Email Communication with MSI
1st Email (Initiating the Claim)
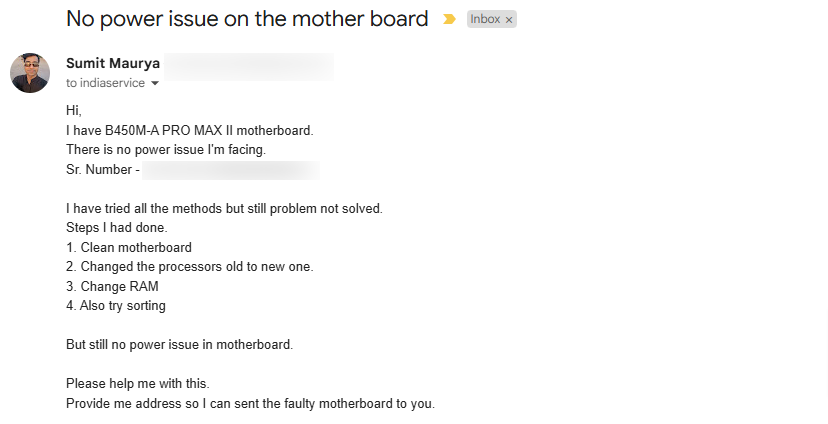
I sent an email to MSI support with the following details:
- Motherboard Model & Serial Number
- Issue Description & Troubleshooting Steps Tried
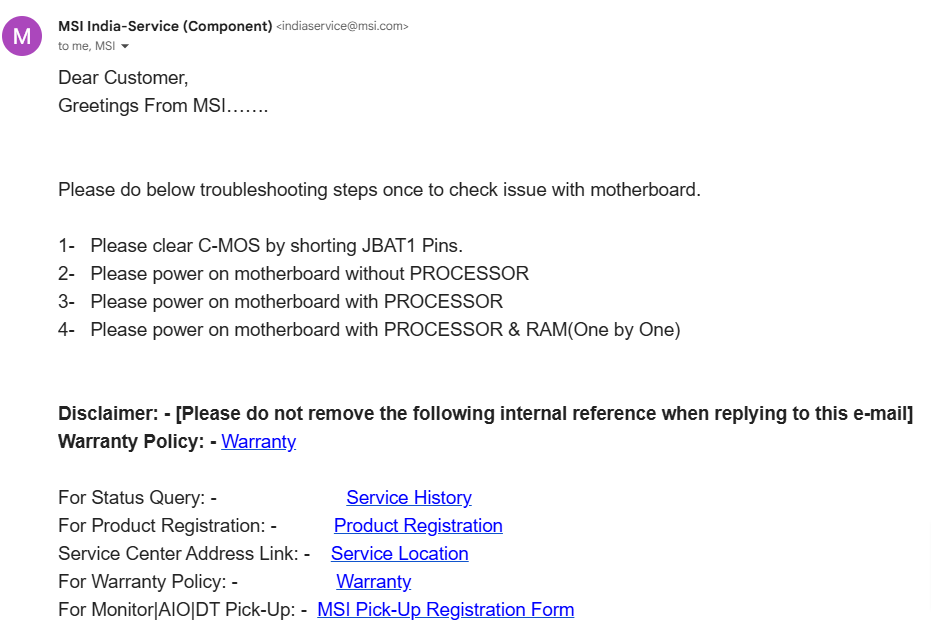
2nd Email (MSI’s Troubleshooting Response)
MSI support replied with troubleshooting steps, asking me to:
✅ Check the PSU & RAM
✅ Reset BIOS settings
✅ Test with another power source
I followed their instructions, but the problem persisted.
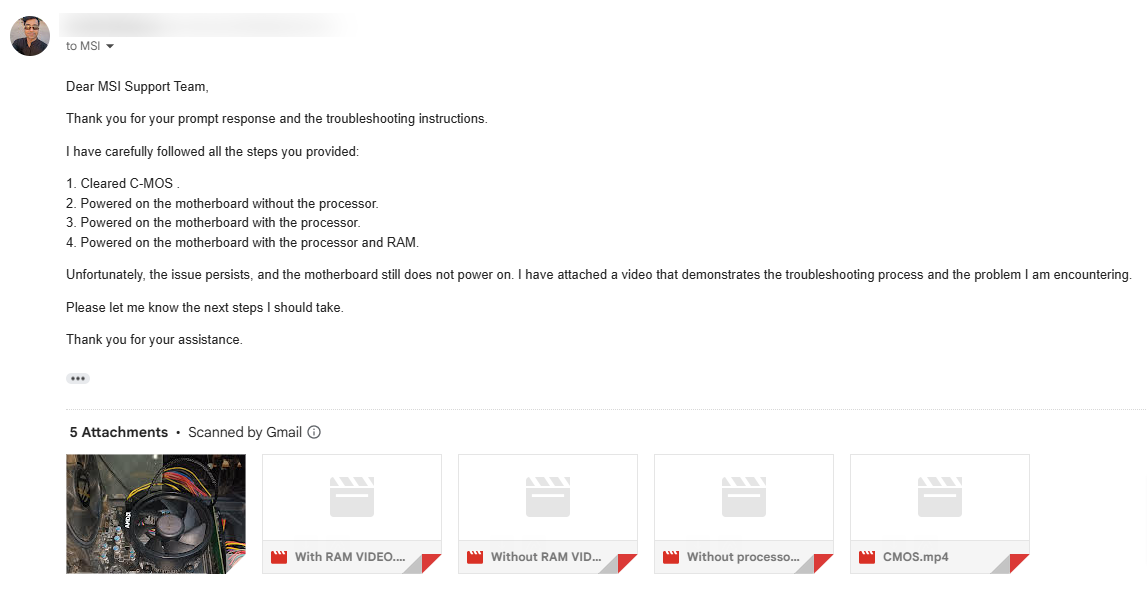
3rd Email (Requesting RMA Approval)
I informed MSI support that troubleshooting didn’t work. They approved my request and provided instructions for sending the MSI motherboard for repair.
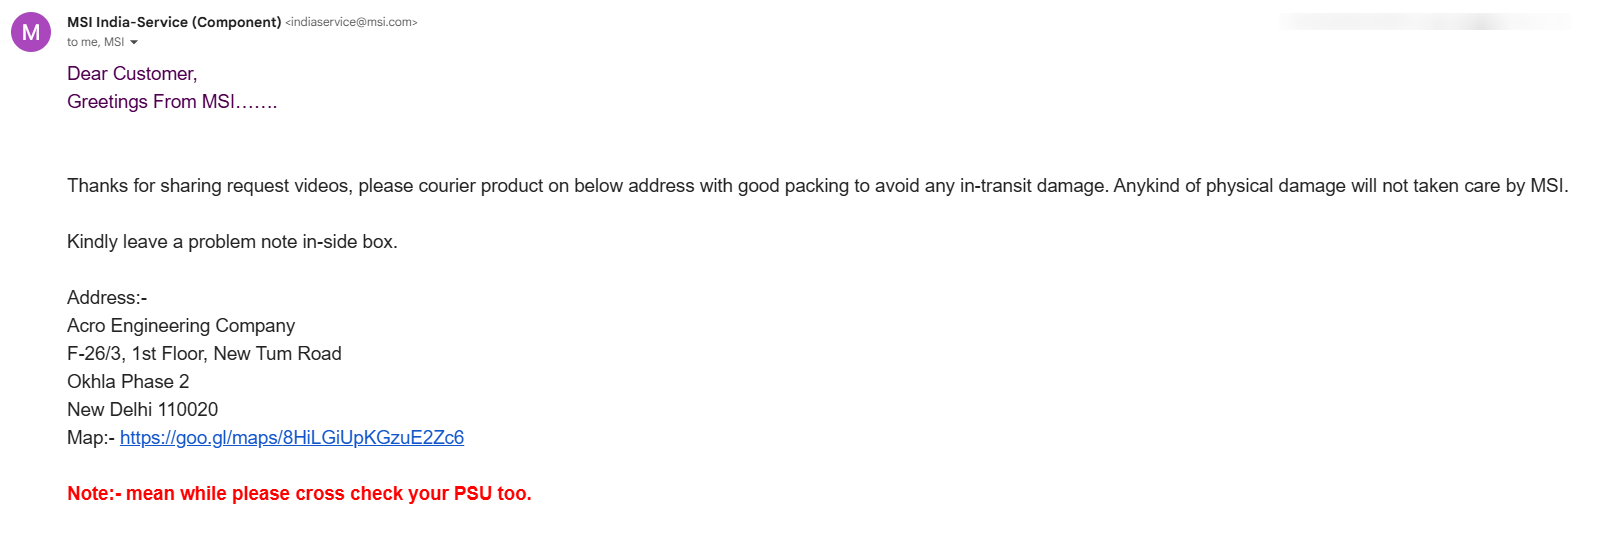
Step 4: Sending the Motherboard to MSI
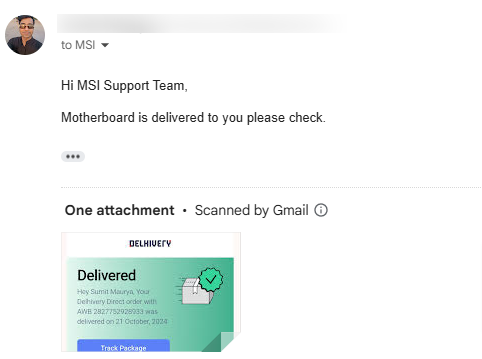
Once MSI approved my warranty claim, I packed and shipped the motherboard to their Delhi office. Here’s what I did:
📦 Proper Packaging:
- Used anti-static packaging to avoid damage.
📍 Shipping Address:
- Sent it to the MSI RMA center as per their email instructions.
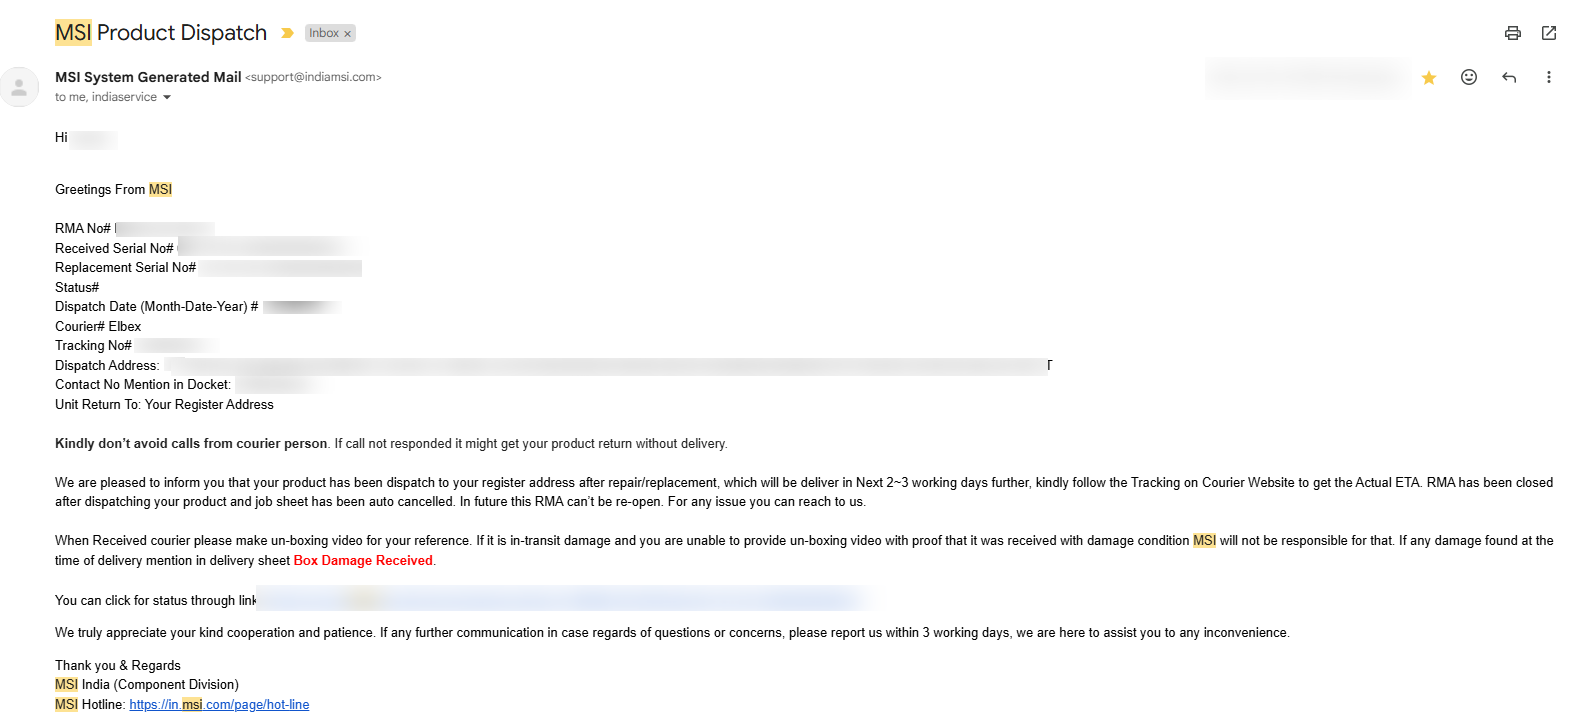
Step 5: Receiving the Repaired Motherboard
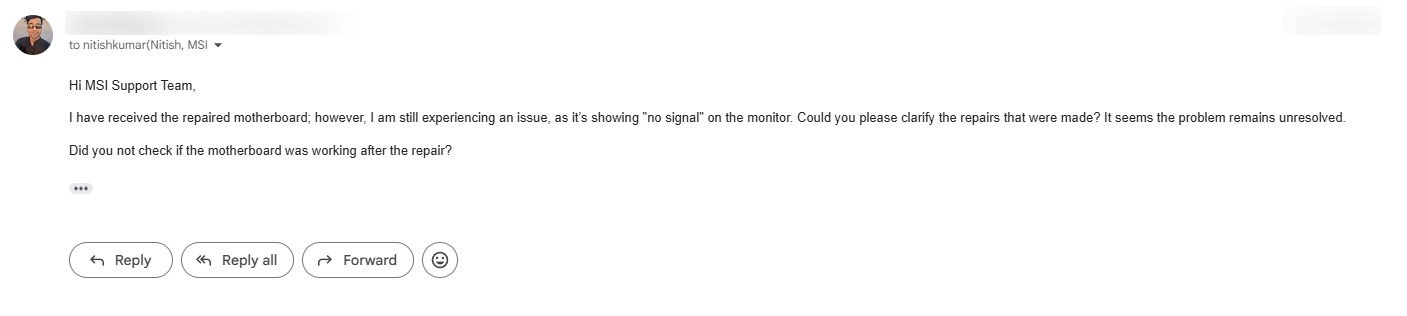
After a few days, MSI returned my repaired motherboard instead of a full replacement. The issue was temporarily fixed, but after a few more days, the same problem occurred.
Step 6: Second Warranty Claim & Final Resolution
Since my issue wasn’t fully resolved, I contacted MSI support again. However, this time, they didn’t respond to my emails. Frustrated, I decided to visit the nearest MSI service center instead.
🔹 Local Service Center Experience:
- I submitted the MSI motherboard with all required documents.
- After a few days, MSI approved my claim and provided a new replacement motherboard.
Final Thoughts & Tips for a Smooth MSI Warranty Claim
🎯 Key Learnings from My Experience:
- Always follow MSI’s troubleshooting steps before requesting a claim. It speeds up the approval process.
- Send the motherboard to the main MSI office if you want a direct response.
- If MSI doesn’t respond, visit the nearest service center—sometimes, they handle claims faster.
- Keep all emails and invoices safe for reference.
If you’re planning to claim your MSI motherboard warranty, I hope my experience helps you navigate the process smoothly! 🚀